|
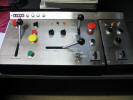
The compact
set of driverís controls. It is a 94 class console
and is detachable. As the simulator further
develops, several different consoles will be available
so drivers can choose which class of locomotive they
wish to drive. The instructor will then select the
appropriate locomotive model on the simulator and the
operating characteristics of that class of locomotive
will then be simulated. |
|
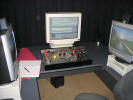
A view of the
driverís station. On the right is the forward
vision monitor where the driver can see the track ahead.
In the centre is the train performance display monitor.
This gives very detailed information to the driver in
real time. For example, track profile and where
the train is situated on the track, track curvature,
coupling status for every bin in the train (buff or
draft state) the force on every coupling in the train,
train speed, acceleration, air pressures, all relevant
operating pressures and temperatures. Below this monitor
are the driverís controls.
To the left of the
screen is the rear vision monitor where drivers can
observe the train behind them as they do when driving
real trains.
Having forward and rear vision also
allows us to run trains in both directions unlike many
other train simulators in use today. The simulator
can build trains up to 200 bins in length, with up to
seven locomotives and a brake van on the rear.
The
driverís controls allow the driver to control a single
unit, multiple units and a brake van if required. |
|
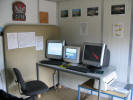
The
instructor's console in the next room. From here
the instructor loads the simulator runs, and prints post
run analysis reports. The instructor can also play the
role of a controller by communicating with the driver
via radio and clearing signals etc for the driver in the
simulator. All voice radio is recorded and can be
replayed for training purposes. The instructor can
also implement locomotive faults and change climatic
conditions. For example the instructor may
introduce rain to the scenario and can also reduce
adhesion to assess a driverís wet weather driving
skills. |
|
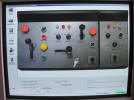
The instructors main
computer monitor can be changed to view several
different screens. This shot shows an animated
screen of the driverís console. This replicates in
real time what the driver is doing with the controls.
The instructor can observe what the driver is doing in
the simulator and identify poor driving practices. |
|
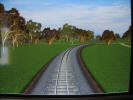
Close up
shot of the forward vision monitor showing the track
ahead. We opted for CGI as opposed to real
footage. It makes life a lot easier to alter
scenarios and make the simulation more interactive.
With video footage it is expensive to film and what you
get on the day you shoot the film, is what you are stuck
with forever unless you want to go and re-shoot it
again!! I had a crash course in a programme called
Studio 3dmax and now build all of our simulator footage. |
|
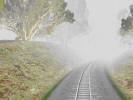
This is an example
of fog which is one of the environmental influences
an instructor can introduce to a simulator scenario.
The simulator also runs in real time, so if you
start a scenario at 1800hrs, as you drive it will
gradually get dark until it is night. So you have to
rely on headlights etc. |
|
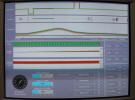
This is a close up of
the train performance display. As you can see in
this shot, the train appears on the track profile so you
can see exactly where the train is situated in relation
to curves and gradients etc. It also allows the driver
to see 2km in advance. We GPS survey our track to
get very accurate track data for the simulator.
Track profile is accurate to within 30mm of the real
track. |
